New baby…and lasagna rolls!

Well, since we last spoke…I had a baby! We welcomed our first son, William Orlando, into the world on August 4th. It was a bit of a stressful event. I went in for a growth scan at maternal fetal medicine and it was determined that he was not doing so well. He was measuring small (IUGR) and it was highly advised that I be induced ASAP. I was 39 weeks and 3 days, so I went ahead with it and started the process the next evening.

Will-Will (as he has been dubbed by his sisters) came out healthy, thriving, and weighing 6.7lbs! He was (still is) perfect, and his extra chromosome that caused us so much anxiety proved to be the sweetest blessing. He had a 24 hour NICU stay due to some blood glucose problems, but he was able to get past it and come home with us a few days later.

41382415_10100674349981059_7792711756177997824_o

On August 29th, we did find out that he has a small hole in his heart, a VSD to be exact. This is an issue that is being closely monitored, but it is not causing any problems as of right now. His cardiologist is fantastic, and we go back to see him in a couple weeks to see if it has closed on its own, or if he will need surgery. Please pray for my little dude.

I have been pretty skimpy on the recipes as of late. With the move, having a baby, and going to all of these specialist appointments- I have not really paid much attention to my camera. It stares at me all day on my kitchen counter top, so this week I promised myself I would get a recipe or two down in the books. So here we go!
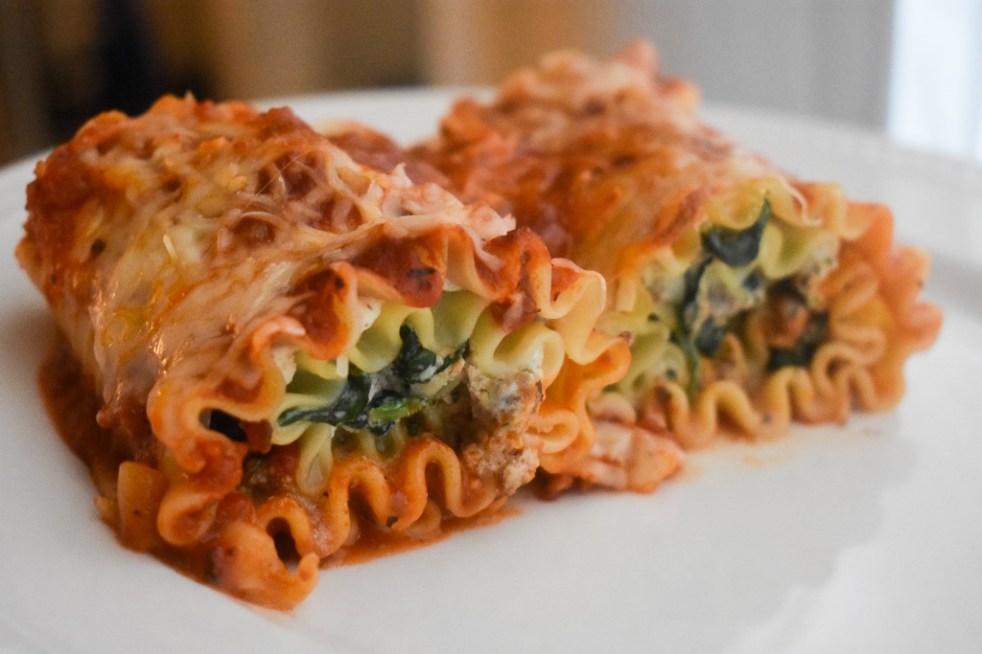
Lasagna Rolls

DSC_0659

You will need:

  • 1 box of lasagna noodles (you’ll need 12, but I prefer to boil 13 in case one rips)
  • 1lb lean ground beef, or ground turkey
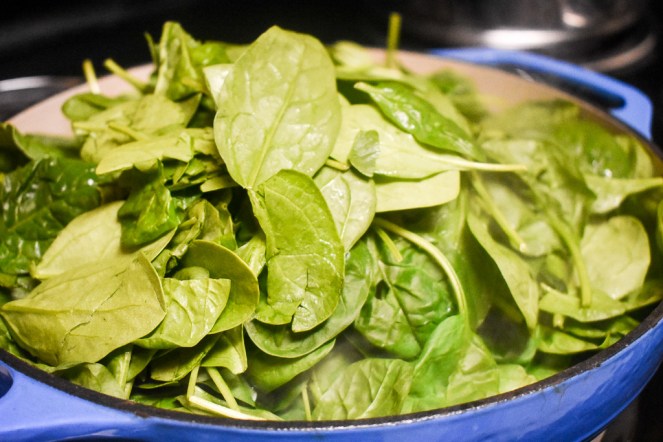
  • 2 cups of baby spinach
  • 1 15oz container of ricotta cheese
  • 1 cup grated Parmesan cheese
  • 1 cup shredded mozzarella cheese
  • 1 egg, beaten
  • 1 tbsp dried oregano
  • 1 tbsp dried basil
  • 2 tsp garlic powder
  • 2 tsp salt
  • 1 jar of your favorite pasta sauce
  • 2 tsp olive oil

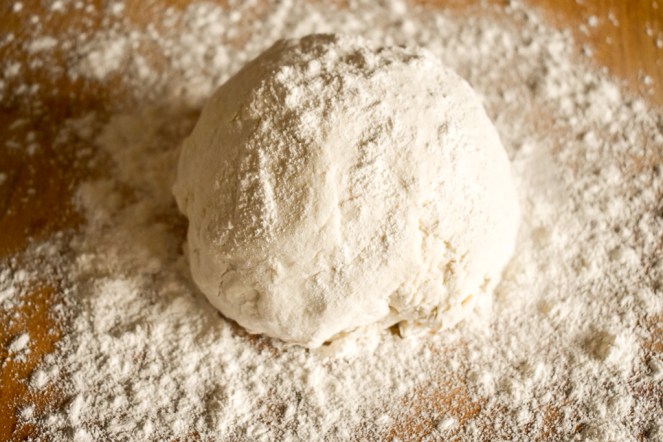
To get started, bring a large pot of water to a boil. Add 2 tsp olive oil to the water, as well as 1 tsp salt. The olive oil will keep the noodles from sticking together. Add in the lasagna noodles, and cook until almost done. Drain the water, and lay the noodles out on a lightly oiled sheet pan, or on a nonstick silicon mat.

Preheat your oven to 350*F. Heat a large skillet or sautee pain over med-high heat. Brown the ground beef until it is just cooked through. Turn down the heat to medium and add in the dried basil and oregano, garlic powder, and remaining tsp of salt. Stir until seasonings mix in with the meat. Add the spinach on top of the meat and let it wilt down. Give everything a good stir, and turn off the heat. DSC_0609DSC_0611

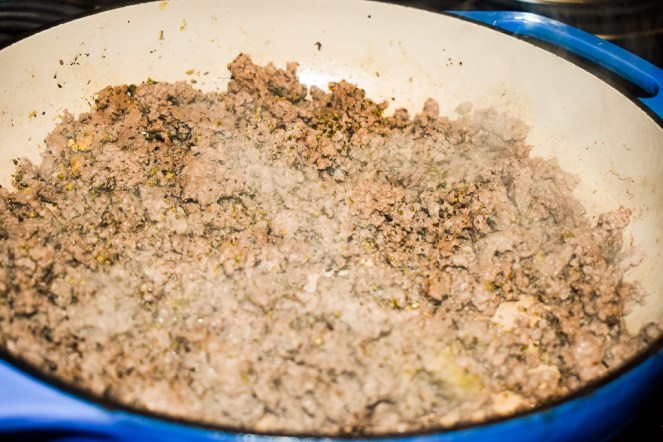
In a separate bowl, combine the ricotta, beaten egg, and 1/2 cup of the Parmesan cheese. Give it a stir. Add the meat and spinach mixture to the ricotta mixture until it is all combined. Grab a baking dish of your choice, and get ready to roll!

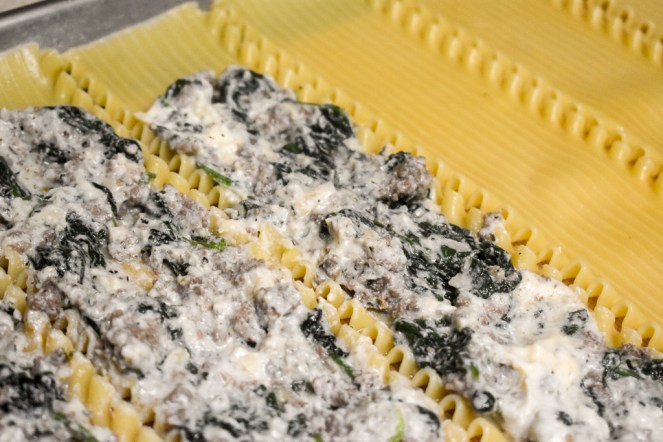
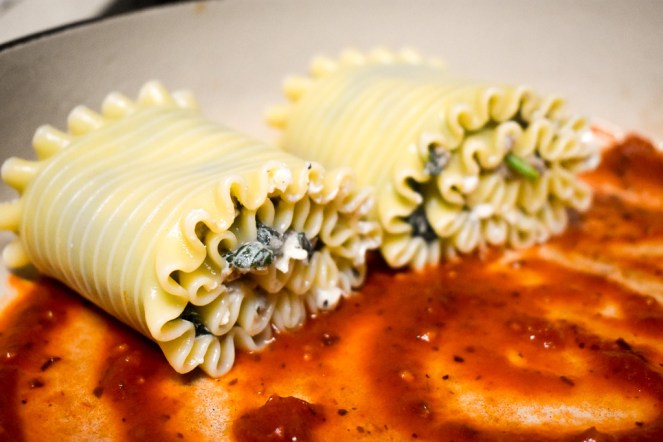
Pour 1/4 cup of your pasta sauce into the bottom of the baking dish and spread around. Scoop about 2tbsp of the meat mixture and gently spreadĀ  over each lasagna noodle. It’s easier to use your hands honestly, so go for it if you want! Just make sure they are clean. I keep about 1-1.5 inches empty on each side of the noodle. This helps them roll easier and it also prevents the filling from spilling out. Add each completed lasagna roll to the baking dish. You can put them side by side, or a small distance apart. Either way works.

DSC_0624DSC_0631DSC_0634DSC_0637

Top the completed lasagna rolls with the remaining pasta sauce, mozzarella cheese, and Parmesan cheese. Bake uncovered at 350*F for 20-25 minutes until the cheese is melted and slightly browned on top. Let cool for 5-10 minutes before serving.

DSC_0638DSC_0648DSC_0659

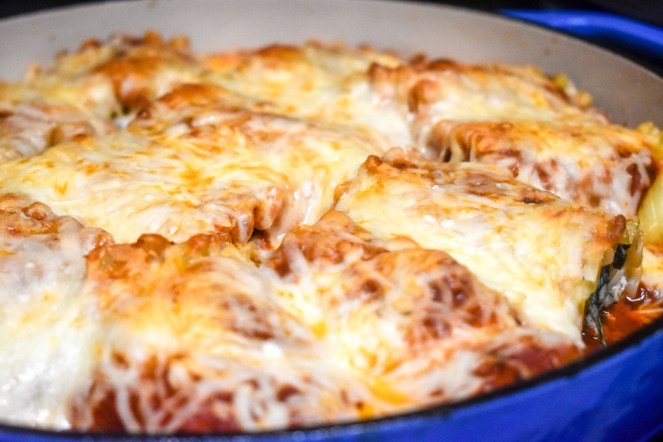
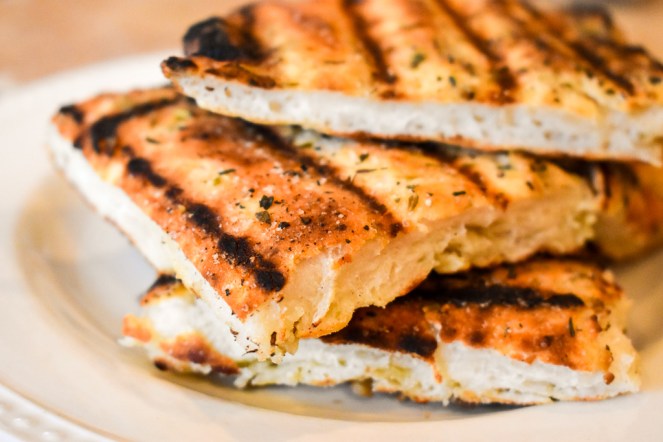
Don’t these look awesome?! They are easy to make, and I have yet to hear a single complaint about them from my kids (even with the 2 cups of spinach in there). You can also make these ahead of time, freeze them, and bake them off at 350*F for 1 hour covered with foil, and bake for another 10 minutes uncovered. Great make ahead meal!

Will-Will is going to be baptized within the coming months. I am going to be an emotional wreck, but in a good way. Again, please pray for him… we really want his heart to be healed.

I hope you love this recipe. If you try it, please leave me some feedback! As always, thank you for your support.

Lots of love and many blessings,

Chelsea

If we love one another,
God remains in us,
and his love is brought to perfection in us.

1 John 4:12

The Perfect Chocolate Cookie

This will be my last recipe for a couple of weeks. We are packing up our house and preparing to leave California for the D.C. area. I am beyond excited to live somewhere new, yet at the same time, I am feeling pretty sad about leaving. We’ve lived here for almost a decade.Ā  Our children’s lives began here, our education was completed here,Ā  and this is where I became Catholic. Please pray for us as we embark on this cross-county drive within the next week or so to arrive at our new beginning.

As I bid “farewell” to California, I think about all of the beautiful time spent in my kitchen surrounded by friends, family, new babies, big kids, little kids, dogs, and whoever else happened to walk in the door for a meal. I have to say, out of all of the food I have prepared, cookies are probably the most popular item. We’ve had a couple friends live with us over the last several years, and they will testify that I am a cookie monster (a.k.a. connoisseur). To celebrate this new beginning, and to also cherish the time here, I put together this absolutely perfect (oh yes, perfect) chocolate cookie recipe. It is one of those recipes that you will want to make over and over and over again. The outside is crispy, and the inside is soft and fudgy.

Chocolate Cookies

DSC_0269

You will need:

  • 4 sticks of softened butter (2 cups)
  • 2 cups of sugar (1 1/2 white, 1/2 brown)
  • 2 eggs
  • 2 cups of flour
  • 1 cup cocoa powder
  • 2 cups semi-sweet chocolate chips
  • 2 tsp vanilla
  • 1 tsp baking soda
  • 1/2 tsp salt

To begin, preheat your oven to 350*F. Line two large baking sheets with parchment paper.

Cream the butter and sugar until light and fluffy. I like to beat this on high for 30-45 seconds with the whisk attachment (if using a stand mixer) until combined. I then scrape the bowl down and beat again on high for another 30-45 seconds until it is really light and fluffy. Go ahead and switch to a paddle attachment and add in the two eggs and vanilla. Give it a good mix on medium speed until everything is well incorporated.

DSC_0210

Next, add in the flour, cocoa, baking soda, and salt all at once. Mix on low to medium speed until combined. Scrape the bowl down and mix again until you can’t see any of the white butter/egg/sugar/vanilla mixture. Add in the 2 cups of chocolate chips and mix on low until well incorporated. It will look quite inviting at this point… but hold back. There’s still more to do! *self control*

DSC_0211DSC_0218

Scoop out 1 tbsp dollops onto the parchment lined sheets. This recipe will make 24 cookies, so aim for no more than 12 per sheet. Make sure there is enough space between each cookie. When cookie recipes have just butter, and not shortening, they tend to spread out more.

DSC_0225

Bake at 350*F for 11 minutes exactly. When the timer goes off, take them out and let them cool for a full 20 minutes. They will come out of the oven fluffy, but as time goes on in the cooling process, they will flatten significantly. The longer you let them cool, the more they will firm up. The outside will be crispy, and the inside will be delightfully fudgy and soft.

DSC_0236DSC_0269DSC_0240DSC_0245DSC_0251

I had so many beautiful photos of them I just decided to put them all here. They are really the best cookies. You can also substitute half of the chocolate chips for peanut butter chips. It is amazing! Beware- these are easy to eat. You have been warned.

I am looking forward to cooking in my new kitchen and sharing my recipes along the way. Thank you so much for your support. If you try one of my recipes, I would love to hear any feedback you may have! Follow me on Instagram @thecatholickitchen if you would like to keep up with our cross-country trip. We will be stopping at beautiful sites along the way. See you in a few weeks!

Lots of love and many blessings,

Chelsea

I will send to you the Spirit of truth, says the Lord;
he will guide you to all truth.

John 16: 7


Peach & Blueberry Crumble

It is a beautiful Sunday, and for you my friends, I wanted to share something sweet. This is a peach and blueberry crumble. Summer is just around the corner, and for me, that opens up an entirely new season of ingredients to cook with. We eat a lot of fruits and vegetables that are grown in the summer, so I really look forward to preparing dishes with seasonal ingredients. This also includes dessert, because…why not? I hope you love this recipe! It is definitely a favorite of mine.

Peach & Blueberry Crumble

DSC_0087

You will need:

  • For the filling:
    • ~2 lbs of sliced peaches (so, 2 15oz cans of sliced peaches- drained, 1 32oz bag of frozen sliced peaches, or 2 lbs of fresh peaches- peeled, pitted, and sliced)
    • 1 cup of blueberries, fresh or frozen
    • 1/4 cup sugar
    • 1/4 cup corn starch
    • ~2 tsp lemon zest (the zest of one lemon is what I am really getting at here, so just zest the lemon you plan on using)
    • juice of one whole lemon (~2-3 Tbsp)
  • For the crumble topping:
    • 1 cup all-purpose flour
    • 1/4 cup white sugar
    • 1/4 cup brown sugar
    • 1/2 tsp salt
    • 1 tsp cinnamon
    • 1 stick of really cold butter, cubed

To get started, preheat your oven to 350* F. If you are using frozen fruit- I highly advise you to thaw it out prior to baking. Otherwise- the dessert will be extra watery.

In a large bowl, combine peaches, blueberries, corn starch, sugar, lemon juice, and lemon zest. Give this a good stir and let it hang out while you mix the crumble topping together. The lemon is an absolute must, so please do not skip this part. DSC_0059DSC_0060
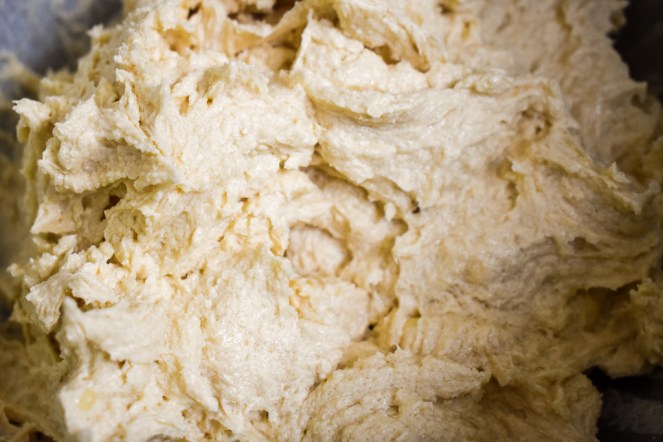
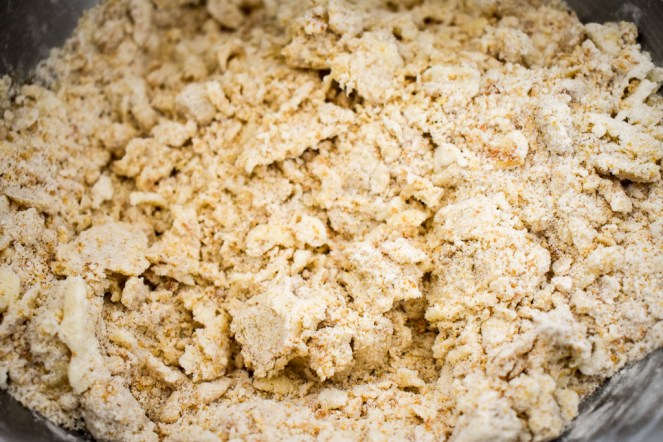
In a separate bowl (using either a stand mixer or a bowl with a hand mixer) combine the flour, white sugar, brown sugar, salt, and cinnamon. Give this a mix until it is combined. Add in the cold butter and mix until it is in small pieces (like the size of blueberries).Ā  Once the butter is in small pieces, use your hand to squeeze the dough together to form larger crumbles. There will be large crumbles, small crumbles, and fine “sand-like” dough in the bowl. This is perfect.

DSC_0061DSC_0062DSC_0064DSC_0065

Set a baking dish on top of a parchment lined baking sheet. I used a 6 inch ramekin, but a pie dish, an 8×8 casserole, or anything small and deep will work. The idea is to have at least a ~1-1.5 inch layer of crumble on top. If you try to bake this in a larger dish with a thin layer of crumble, it might not end up as crispy as you’re expecting. Keep the dish deeper and smaller to ensure a thick layer of crumble.

In your baking dish, add in the fruit mixture, and then top with all of the crumble mixture. The fruit mixture will have some liquid from the lemon juice and corn starch. This is okay. The corn starch will thicken as it heats, resulting in a deliciously gooey fruit filling. Also, when you’re adding the crumble mixture on top- it’s going to seem like you are putting a ton on there, but trust me- get it all on. Don’t pack it down, just pile it all on there as good as you can. The butter in the mixture will help it to melt down and bake into a seriously crispy topping.

DSC_0068DSC_0070

Place the sheet pan with the baking dish into the oven on the center rack, and bake for 45 minutes until the top is golden brown and the filling is bubbling to the top.

DSC_0077

Allow this to sit and cool for 10-15 minutes. Serve in a bowl alongside vanilla ice cream with a sprinkle of cinnamon.

DSC_0087DSC_0088

This dessert is absolutely wonderful. It is sweet, yet bright and tangy.Ā The lemon zest and juice really bring out the flavors of the fruit, and the crumble topping is crisp and plentiful. It is always a big hit wherever I take it. You can easily double this recipe for a get-together or church pot-luck. I have also made this ahead of time and frozen it before baking. If you want to do this, just take it out of the freezer and bake at 350 *F for ~1-1.5 hours.

I hope you love this recipe! It is a favorite of mine. My husband is not a fan of baked fruit desserts (feels like stab to the heart sometimes… I love all things cobbler, pie, crumble, and crisp!) but my kids and I gobble this up every time I make it.

As always, thank you for your support. If you don’t already, give me a follow over on Instagram @thecatholickitchen.

Lots of love and many blessings,

Chelsea

Whoever loves me will keep my word, says the Lord,
and my Father will love him and we will come to him.

John 14:23

Greek Yogurt Flatbread

Today is the first day of May! I can’t believe it. Time flies, doesn’t it? I graduate in 10 days and I cannot tell you how excited/relieved/thankful I am. I have one exam to get through, so pray for me please!

Today’s recipe is one that is a huge hit with my family. It only takes 10 minutes to make (maybe 15 if it’s your first time), and that includes cooking time. The ingredients are simple, the cooking process is quick, and this can be manipulated to fit into any meal idea! I hope you love it.

Greek Yogurt Flat Bread

DSC_0137

You will need:

  • 1.5 cups all-purpose flour
  • 1 cup plain Greek yogurt
  • 1 1/2 tsp baking powder
  • 1/2 tsp salt
  • 3-4 Tbsp olive oil
  • a grill, a grill pan, or a flat dry pan

To get started, add the flour, salt, and baking powder into a bowl. Whisk it around until it is all mixed together. Go ahead and dollop the Greek yogurt into the middle of the bowl. To mix this without getting completely messy, start by covering the yogurt with the surrounding flour mixture. Once it’s covered, press down gently. Keep folding the flour over onto the yogurt and pressing down until it is all mixed in. Form it into a ball. Your hands shouldn’t get too messy if you do it this way.

DSC_0099DSC_0100

The ball of dough should be firm and not sticky at this point. Go ahead and flour a surface. Place the dough onto the floured surface and sprinkle some flour on top. Roll the dough out into whatever shape you like. Mine always ends up in this oval/rectangle kind of shape. I just go with it. It should be about 1/2-3/4 inch thick. If you find that the dough is sticky, sprinkle a little flour on top to keep your rolling pin from sticking.

DSC_0102DSC_0109

At this point I transfer the dough onto a sheet pan lined with parchment paper. This is where you can get as creative as you want with seasoning. For today though, I am keeping it simple. We are eating this with soup, so I am not going to overly season it.

I drizzle 1-2 Tbsp of olive oil over the dough and spread it out to the very edges with my hands. I sprinkle salt, pepper, and Italian seasoning over the top. Flip it over and do the same to the other side.

DSC_0121

If you’re grilling this, cook it for 2-3 minutes on each side over med-high flame. If you’re grilling this in a grill pan, do the same. The grill marks will vary from golden brown to a slight char on the edges. The inside of the bread will be nice and fluffy, yet dense and chewy. The outside will have a light crunch and excellent texture. DSC_0124DSC_0126

If I am eating this with soup, I cut it into squares that are easy for dipping and scooping. You can also pile on a salad with a balsamic vinegar dressing and fresh tomatoes for a flatbread lunch. The possibilities are really endless!

DSC_0137

I hope you love this recipe. It’s a family favorite of mine, and this specific amount is enough for each person to have 2-3 pieces alongside their meal. Again, it is very easy and super quick to make! I love that it only has a couple ingredients and doesn’t require any sort of rise time or yeast activation.

As always, thank you for your support. If you try this recipe, I’d love some feedback! If you don’t already, give me a follow over on Instagram @thecatholickitchen.

Lots of love and many blessings,

Chelsea

Jesus said to his disciples:
“Peace I leave with you; my peace I give to you.
Not as the world gives do I give it to you.
Do not let your hearts be troubled or afraid.
You heard me tell you,
‘I am going away and I will come back to you.’
If you loved me,
you would rejoice that I am going to the Father;
for the Father is greater than I.
And now I have told you this before it happens,
so that when it happens you may believe.
I will no longer speak much with you,
for the ruler of the world is coming.
He has no power over me,
but the world must know that I love the Father
and that I do just as the Father has commanded me.”

John 14: 27-31


Slow Cooker Turkey Meatballs

I am two assignments away from graduating with my B.S. in Public Health (praise God!) and my stress level is through the roof. Outside of being a full-time student, I am first and foremost a wife and mother. I enjoy making dinner for my husband and three kids. During times like this (aka final exams) I have a lot of school work and other activities going on. I am desperate for easy meal options that are both healthy and delicious. The key to doing this without skimping on nutrition and flavor is utilizing my slow cooker. I love the idea of “set it and forget it” until dinner time comes around, and I can serve it up like I’ve been standing over the stove all day. I like to call this, “Mom Magic!” This recipe is also great for when you look up at noon and realize you haven’t planned a thing for dinner (or the appetizer you intended for a get-together).

The key behind this recipe is using a freezer friendly ingredient. As I have mentioned before, I shop at Costco. I buy a 64oz bag of pre-cooked frozen turkey meatballs (approximately 50-60 meatballs). I also do this with beef as long as the price is reasonable. You are absolutely welcome to make turkey meatballs from scratch, cook them, and freeze them for later use. I do that too when I am on a serious prep-wagon and meat is on sale. I like turkey meatballs because they are low fat, low sodium, high protein, and low carb. They aren’t overly flavorful either (the only time I’m happy about that), so they go well with any type of sauce or gravy you choose to pair them with. They can be used as appetizers or the main star of your meal. Now, moving along to the good stuff!

Slow Cooker Turkey Meatballs

DSC_0041

You will need:

  • ~25-30 frozen pre-cooked turkey meatballs (each should be about the size of a golf ball if you’re making them from scratch)
  • For the sauce (aka best sauce ever!)
    • 1/4 cup brown sugar
    • 1/4 cup honey
    • 1/2 cup ketchup
    • 2 Tbsp low-sodium soy sauce (liquid aminos works here too)
    • 3-4 cloves garlic, chopped
  • non-stick spray (I use canola oil spray)
  • 6qt slow cooker with high and low settings

To start, plug in your slow cooker and give it a good spray with non-stick spray. If you prefer to use slow cooker liners, go for it! DSC_0011

Next up, place the frozen turkey meatballs into the bottom of the slow cooker. In a separate bowl, add in all of the ingredients for the sauce and stir until well combined. Pour the sauce over the meatballs and give everything a good stir until all of the meatballs are coated. Put the slow cooker lid on and cook on low for 3 hours, or until the meatballs are heated through. Each slow cooker heats a bit differently, so check them at 3 hours and make the call. DSC_0015
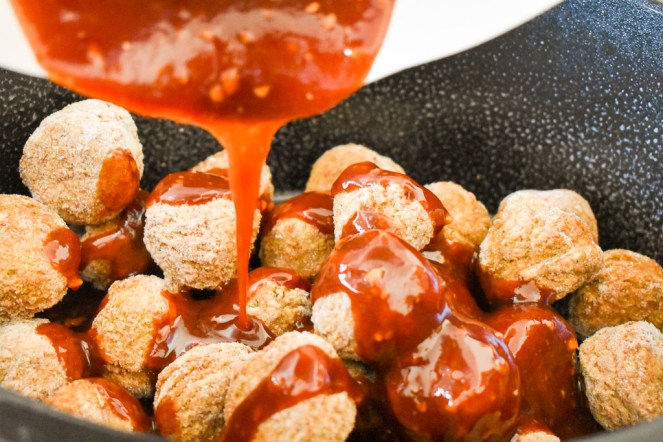
Once the time is up, give everything a stir to make sure all of the meatballs are coated in the sauce. It should smell pretty amazing at this point. If you are serving this as a main meal, you can pair it with mashed potatoes, roasted veggies, egg noodles, rice, etc. If you’re serving this as an appetizer, just place some cocktail picks or forks next to the slow cooker and let people help themselves. I have cooked the whole batch of meatballs before for a party (approx 50-60 meatballs) and just doubled the sauce recipe to accommodate for more meat.

DSC_0041

I hope you love this recipe! It is a big hit with my entire family. The sauce is simply amazing. It might be a strange list of ingredients, but once cooked together- you really can’t beat it. The slow cooker really helps me out when my end goal is to get everyone together for a hot meal at the table. The time I get to spend with my family is priceless.

Please pray for me, and my family’s patience (ha), as I get through these next two weeks of school. This has been an uphill climb, and I am so happy to be (nearly) done. We are also preparing to move across the country, welcome a new baby into this world, and start life in a brand new city. As always, thank you for your support. If you don’t already- give me a follow over on Instagram @thecatholickitchen.

Lots of love and many blessings,

Chelsea

Jesus said to his disciples:
“If you know me, then you will also know my Father.
From now on you do know him and have seen him.”
Philip said to Jesus,
“Master, show us the Father, and that will be enough for us.”
Jesus said to him, “Have I been with you for so long a time
and you still do not know me, Philip?
Whoever has seen me has seen the Father.
How can you say, ‘Show us the Father’?
Do you not believe that I am in the Father and the Father is in me?
The words that I speak to you I do not speak on my own.
The Father who dwells in me is doing his works.
Believe me that I am in the Father and the Father is in me,
or else, believe because of the works themselves.
Amen, amen, I say to you,
whoever believes in me will do the works that I do,
and will do greater ones than these,
because I am going to the Father.
And whatever you ask in my name, I will do,
so that the Father may be glorified in the Son.
If you ask anything of me in my name, I will do it.”

John 14:7-14


Turkey & Egg White Avocado Brunch

My family lives in avocado country! We are immensely blessed with how beautiful it is here, and we will surely miss it when we have to move in a month or so. We get avocados year around for cheap, and only when I travel elsewhere do I realize how lucky we are! Avocados are like gold in some places, so if you happen to stumble upon a good avocado bargain where you’re at- this recipe will help you to utilize them outside of guacamole. This recipe is fairly quick, and a great idea for a Sunday after-Mass brunch, bible study group, or quick brunch with friends.

Turkey & Egg White Avocado Brunch

DSC_0953

You will need:

  • 1 medium to large ripe avocado, sliced in half and pitted
  • 1 egg white
  • 1 slice of lean turkey deli-meat, chopped
  • 2 tsp salt-free or salt-alternative seasoning (I use Tony Chachere’s, but you can make your own by combining 1/4 tsp cumin, 1/4 tsp chili powder, 1/4 tsp garlic powder, 1/4 tsp onion powder, 1/2 tsp oregano, and 1/2 tsp smoked paprika)
  • 1 lime, halved
  • 2 tbsp fresh cilantro, chopped

To get things started- preheat your oven to 350.

Slice the avocado in half and remove the seed. Take a fork and run it along the inside of the avocado to create grooves. This will help hold in the filling, as well as assist in getting the seasoning down into the avocado better. Squeeze half of the lime over the avocado halves, and sprinkle 1/2 tsp of seasoning on each half. Lime juice and avocado is the best combination ever. It also prevents the avocado from turning brown.

DSC_0965DSC_0967DSC_0970DSC_0971

Combine the egg white and turkey together in a separate bowl. Make sure they are well-mixed together. Place the avocado halves in an oven-safe skillet, baking dish, etc. If they have a hard time sitting up straight, you can use a piece of foil to create an object for it to balance against. Once your avocados are sitting up straight, spoon in the turkey and egg white mixture. Top with the remaining seasoning. Bake at 350 for 15 minutes. Broil on low for 3-5 minutes. DSC_0976DSC_0977

Let them sit for 5 minutes when they come out. Once they are cooled a bit, put them on a plate and top with fresh cilantro and a squeeze of lime. Serve alongside fresh tomatoes, fruit, or whatever you like for brunch. When you’re ready to eat, just pull at the sides of the avocado with a fork and mix it together for the perfect bite!

DSC_0953DSC_0990

This recipe is healthy, filling, and pretty fun to make! If you are quite hungry, go ahead and eat both halves. However, if you’re planning on having a side with it, I would go with sharing the other half with your spouse, friend, or kiddo! You can make this in large batches, too. Just line the avocados up in a casserole dish and follow the same instructions depending on how many you decide to make.

I hope you love this recipe. If you are put off by the idea of warm avocado- don’t knock it until you try it. The flavor and texture is hard to beat. I would love for you to give Tony Chachere’s salt-free seasoning a taste as well. It is delicious! I have been a Tony’s fan for years and years (the original creole version). However, the amount of sodium in the original seasoning is a bit alarming. It was a tough decision, but in order stay mindful about taking care of ourselves, I opted to purchase the salt-free version this go around. It is just as tasty as the original, and I don’t feel guilty putting it all over my food.

As always, thank you for your support. If you don’t follow me on Instagram, you can do so @thecatholickitchen.

Lots of love and many blessings,

Chelsea

I am the good shepherd, says the Lord;
I know my sheep, and mine know me.

John 10:14

Refrigerator Pickles

I want to start by saying thank you to everyone who reached out via comments and messages in response to my Friday Introduction on Instagram. I don’t know why I just now did one, but it was such a surprise to have all of those wonderfully sweet comments and private messages from people. You restore my faith in the world, and it goes to show that social media can be an extremely positive experience. So, thank you from the bottom of my heart for all of your prayer intentions and kind words.

We had an appointment last Tuesday for baby boy’s heart. We are thrilled to report that no major defects were found, and he has been cleared as healthy! We know that ultrasounds only see so much, so we are aware that there could still be some small abnormalities. The cardiologist informed us that if there was something small, it would be pretty easy to correct. So, please keep us in your prayers for continued good health for our son. We can’t wait to meet him in August!

This week I am doing something easy and fun: pickles! love a cold and crunchy pickle alongside my sandwiches in the summer time. I enjoy them right out of the jar, too, with some crackers and cheese as a snack. There is something great about making your own pickles and enjoying the freshness of them. Although I do enjoy regular store-bought ones, I have come to prefer this method any day of the week! I hope you love it.

Refrigerator Pickles

DSC_0935

You will need:

  • 5-7 Kirby cucumbers (cocktail), or English cucumbers (long and wrapped in plastic) *see first paragraph about how to cut them depending on how fast you want a pickle.
  • 2 cups of hot water
  • 1 1/2 cups of distilled white vinegar
  • 1 Tbsp sugar
  • 3 tsp kosher salt
  • 2 tsp whole peppercorns
  • 4 cloves of garlic, chopped
  • 1 cup of fresh dill, chopped or torn
  • 2 standard mason jars (1 pt each)

Now, the idea behind refrigerator pickles is to skip the entire canning process. The only downside to this recipe is that you will need to eat them within 2 weeks of opening. This makes enough to fill two mason jars, so if you don’t think you can finish this amount in two weeks, cut this recipe in half. *Important note: if you want overnight pickles, slice the cucumbers into spears or slices. If the flesh of the cucumber is exposed, it will pickle faster. If you want pickles within 5-7 days, keep them whole and let them hang out in the fridge. It will take a few days to permeate the skin of the cucumber.

If you don’t know what a Kirby cucumber is- see picture below. They are usually about 6 inches long and have little bumps on their skin. If you shop at Costco- they are in the refrigerated produce section in a bag labeled “cocktail cucumbers.” As far as any other grocery store, they should be by the regular cucumbers. If not, just ask a produce manager. English cucumbers are the longer ones wrapped in plastic. Their skin is not waxed. This makes them much easier to pickle. No need to peel the Kirby or English versions. Don’t be like me and buy the slicing cucumbers (the regular dark green ones with the waxy skin and seeds). You won’t have a very tasty pickle. Oh well, you live you learn, right? I ate them anyway.DSC_0878

For the pickling liquid: Into a bowl, add in 2 cups of hot water, 3 tsp kosher salt, 1 Tbsp sugar, and 1 1/2 cups of distilled white vinegar. Give it a stir and set to the side. Next step: Go ahead and pack your jars. To the bottom of each jar: Add in 1tsp peppercorns, 2 cloves of chopped garlic, and 1/3 cup of fresh dill. Pack in the cucumbers. You want to make sure the jar is full, but not packed so tight that the pickling liquid cannot reach every piece of cucumber. Top the cucumbers with the remaining dill. Pour in the pickling liquid until it is full (it will still be warm- totally okay) and close the lid tight. Turn the jar upside down a couple times to get everything mixed together. Place into the fridge for picking magic!

DSC_0883DSC_0885DSC_0908DSC_0891DSC_0893DSC_0896DSC_0897

If you sliced your cucumbers- your pickles will be ready in 24 hours. If you did not slice your cucumbers, they will be ready in 5-7 days. You will notice that I used a regular cucumber for my sliced version…ignore that and do not repeat my error. I wanted to see if it would work, and although it did give a mild pickle flavor, it did not turn out as good as I wanted. Regular cucumbers have a thick waxy skin, lots of seeds, and a strong flavor. This is not an ideal combination for a pickle! However, I did not want to waste them, so I am eating them anyway. As far as how I sliced them- go for it. That slice would be absolutely perfect on an English cucumber. Recipe testing is a learning process, and I do not always get everything right (my husband has endured some wonky recipes).

DSC_0906DSC_0911

I hope you love this recipe. Pickles are a fantastic addition to a quick lunch or snack. I really enjoy making them, and I think the jars look so pretty with all of the green (my favorite color). I have a sweet pickle recipe my grandmother used to make for us, and once I test it, I will definitely post it. I love all types of pickles, so I am going to be doing more of them. If you want to dress these up a bit more or make them spicy, feel free to add 1 tsp of mustard seeds and 1 tsp red pepper flakes to each jar. This addition will give them a nice zing!

DSC_0935

As always, thank you for your support. I love making recipes to share, and I hope they are fun for you to make and eat. If you try any of these and want to give me some feedback- I am always welcome to comments! If you’re not already doing so, give me a follow over on Instagram at @thecatholickitchen.

Lots of love and many blessings,

Chelsea

The crowd said to Jesus:
“What sign can you do, that we may see and believe in you?
What can you do?
Our ancestors ate manna in the desert, as it is written:

He gave them bread from heaven to eat.”

So Jesus said to them,
“Amen, amen, I say to you,
it was not Moses who gave the bread from heaven;
my Father gives you the true bread from heaven.
For the bread of God is that which comes down from heaven
and gives life to the world.”

So they said to Jesus,
“Sir, give us this bread always.”
Jesus said to them, “I am the bread of life;
whoever comes to me will never hunger,
and whoever believes in me will never thirst.”

John 6: 30-35


Steel-Cut Granola

This week, I had the pleasure of writing for Catholic Women Run. The piece I wrote can be foundĀ here, but a synopsis of it includes focusing our food and fitness lifestyle around our faith. If you aren’t familiar with them, go check out their page, or even take a browse over at their Instagram! I love pages that encourage healthy lifestyles. It really is nice to see faith-minded women supporting each other in their health and fitness goals.

I wanted to feature an ingredient that can be used in several different ways. I have a thing for breakfast food, and something I am really loving lately is the many ways to eat oats! I eat both steel-cut and rolled oats, but today’s recipe focuses on steel-cut.

There is little to no difference in the nutrition between steel-cut and rolled oats, but rather the difference lies in their shape, mouth-feel, and how they are digested. They both contain biotin, manganese, and plenty of fiber! Rolled oats start as whole grain oats (groats) that are hulled, steamed, and rolled flat in order to be cooked faster (Old Fashioned oats, Quick Cook oats, Instant oats, etc). Steel-cut also start out as groats that are hulled, but instead of being steamed and rolled, they are simply sliced into 2-3 pieces by a steel blade, which gives them their pin-like appearance. Due to the lack of steaming and pressing, they are slower to digest and are given a lower glycemic index. This is better for staying fuller for longer periods of time, and preventing a sharp spike in blood sugar.

Rolled oats on the left. Steel-cut on the right.

Steel-Cut Granola

EditJar1

You will need:

  • 3 cups of raw steel-cut oats
  • 2 cups of chopped nuts (I used almonds)
  • 1/2 cup unsweetened applesauce
  • 1/2 cup of honey
  • 1/4 cup of coconut oil, (any light tasting oil is fine here- but try to keep it healthy)
  • 3 tsp cinnamon
  • 1 tsp vanilla extract
  • 1/2 tsp salt

Preheat your oven to 300*F. Line a sheet pan with parchment paper or a silicone liner.

Combine oats, chopped nuts, cinnamon, and salt into one bowl. In a microwavable bowl, combine the applesauce, coconut oil, honey, and vanilla. Microwave it for 30 seconds on high until everything is melted together. You can also do this on low in a sauce pan. Pour wet ingredients into dry ingredients and stir until everything is coated. DSC_0741DSC_0743DSC_0745DSC_0747DSC_0751DSC_0753

Spread mixture out onto a parchment lined sheet pan. If there are gaps that expose parchment paper, don’t stress. Everything will cook just the same if it is not perfectly spread out.

  • Bake at 300*F for 20 minutes.
  • Take out and flip with a spatula.
  • Bake again for 20 minutes.
  • Take out and flip with a spatula.
  • Bake again for 20 minutes.
  • Take out and give it a good flattening with a spatula or spoon. Walk away from it and don’t touch it for at least an hour.

DSC_0756DSC_0762DSC_0764DSC_0765

At the end of an hour, you can scoop the granola into a storage container or gallon freezer bag. If you like, you can also add in 1 cup of dried fruit and 1/2 cup of pumpkin or sunflower seeds. Your prerogative! I keep mine plain at this point because I like to mix it into parfaits layered with plain Greek yogurt, honey, and fresh fruit. I also like to eat it in a bowl with milk, or just snack on it straight from the bag.

EditJar2

It is delightfully crunchy, slightly sweet, and nutritionally dense!

I hope you love this recipe!

Lots of love and many blessings,

Chelsea

This is the day the LORD has made;
let us be glad and rejoice in it.

Psalms 118:24


Delightful Broccoli Salad. Emphasis on the light.

It is Saturday of Holy week. As we prepare for the resurrection of our Lord and Savior, we spend today in silence and contemplation. As busy as Easter can be for us, it’s good to take some time and reflect on what this holiday means. I did some Easter lunch prep today and spent some much needed time in silence. It is hard to get a moment of quiet around my house, but my kids were playing outside for a while and my husband was resting on the couch. It was nice!

I made this broccoli salad with a few changes. I wanted to lighten it up a bit. The original recipe I have is made with full-fat mayo, sour cream, and sugar. While the original recipe is delicious, I wanted to be more conscious of what I was adding to this beautiful vegetable without compromising the taste. I love broccoli salad, so I feel that this lightened up version does it justice. I hope you love this recipe.

Broccoli Salad

DSC_0817

You will need:

  • 2 large heads of broccoli (about 5-6 cups), cut into florets, blanched & shocked
  • 1 c shredded cheddar cheese
  • 3/4 c light mayo (I use light olive-oil based mayo)
  • 1/4 c non-fat plain Greek yogurt
  • 1/2 c unsalted sunflower seeds
  • 1/2 c bacon, chopped
  • 2/3 c dried cranberries
  • 1/3 cĀ  red onion, or shallot, finely diced
  • 3 tbsp honey
  • 1 1/2 tbsp white vinegar
  • 1/2 tsp salt
  • 1/4 tsp pepper

To start: if you don’t know what blanching and shocking is- here’s a quick tidbit. After you’ve cut your broccoli into florets, boil them for 1 minute (blanch). After 1 minute, immediately transfer them to a bowl of ice water (shock). The blanching helps the broccoli cook a little while turning it into a vibrant green (see the difference between photo 1 and 4 below?). Shocking it keeps it from cooking further so it will maintain its color and crunch. Drain the broccoli after it has completely cooled in the ice water. Lay it to dry on a sheet pan lined with paper towels.

DSC_0797DSC_0798DSC_0800DSC_0803

Now- for the dressing!

Grab a large bowl. This will be the bowl everything goes in, so make sure it is big. Add the light mayo, Greek yogurt, honey, vinegar, salt, and pepper. Give this a whisk. On top of that, add in the dried cranberries, sunflower seeds, chopped bacon, diced red onion or shallot, and cheddar cheese. Add the broccoli on top. With a large spoon, gently mix the dressing in with the broccoli until everything is well combined.

DSC_0807DSC_0808

Cover with plastic wrap and put in the fridge for 1-2 hours (or overnight). This is a great dish to make the night before. It sits will in the refrigerator, and I personally like for it to have time to hang out before serving. The flavor gets better! However, if you are in a rush and need something that day- a couple hours in the fridge will yield a delicious broccoli salad.

DSC_0817

I hope you and your family have a Happy Easter. We will be attending Mass, hunting eggs, and enjoying a big lunch together with friends. My menu includes a glazed ham, potatoes au gratin, roasted squash and zucchini, and this broccoli salad. There will be dessert too (our friends are bringing lemon bars and we made some homemade ice cream).

As always, thank you for your support. If you don’t already, give me a follow over on Instagram.

Lots of love and many blessings,

Chelsea

When the sabbath was over,
Mary Magdalene, Mary, the mother of James, and Salome
bought spices so that they might go and anoint him.
Very early when the sun had risen,
on the first day of the week, they came to the tomb.
They were saying to one another,
“Who will roll back the stone for us
from the entrance to the tomb?”
When they looked up,
they saw that the stone had been rolled back;
it was very large.
On entering the tomb they saw a young man
sitting on the right side, clothed in a white robe,
and they were utterly amazed.
He said to them, “Do not be amazed!
You seek Jesus of Nazareth, the crucified.
He has been raised; he is not here.
Behold the place where they laid him.
But go and tell his disciples and Peter,
‘He is going before you to Galilee;
there you will see him, as he told you.'”

Mk 16: 1-7

Brussels Sprouts: The underdog of vegetables.

My kids must be made of some fairy dust because their favorite vegetable is roasted Brussels sprouts. Seriously. It’s funny because my own dad can’t stand them and won’t touch them. If you’re like my dad, but you’re willing to give them a second chance, follow this recipe exactly and you will not be disappointed!

Roasted Brussels Sprouts

DSC_0736

You will need:

  • 12-15Ā  Brussels sprouts, cut in half (I try and aim for 7-8 halves per adult, and 4-5 halves for kiddos. 15 will give you 30 halves, so just add more or take away some according to your family size)
  • 3 Tbsp extra virgin olive oil
  • 1/2 tsp salt
  • 1/2 tsp pepper
  • 3 Tbsp freshly grated Parmesan cheese

Preheat your oven to 400*F. Line a sheet pan with foil or parchment paper, either will work. Cut the fibrous stem off of each Brussels sprout and discard. Then, cut each sproutĀ  in half. Some of their leaves will fall away, and that’s fine. They end up roasting into super crunchy bits anyway, so throw them in to cook as well. Toss all of the sprouts onto the sheet pan. Drizzle with olive oil, and then sprinkle with salt and pepper. Mix around with your hands until everything is coated evenly. Roast for 25 minutes at 400*F.

DSC_0714DSC_0722

After the time is up, they should be golden to dark brown. Sprinkle the Parmesan cheese on top as soon as they come out. Serve alongside whatever you wish! We had them with steak and roasted red potatoes. I am guilty of eating all of the excess crunchy leaves that fell away during the preparation process. I wish they came in a bag like chips…

DSC_0727DSC_0724DSC_0730

These are simple to make and always a hit with us. I have turned a few of my friends onto Brussels sprouts after making them this way. A little side note- any green veggie does great with just olive oil, salt, and pepper with a 25-30 minute roast at 400*F. If you want to dress them up- add the Parmesan! If you try this out, please let me know. Don’t be afraid to try them… they are delicious (and pretty darn good for you too!)

DSC_0736

As we go deeper into Holy Week, I can’t help but reflect on what a crazy Lenten season this has been for our family. Lent always seems to throw us into a storm, but we end up coming out of it renewed. As with all struggles, we are to give them to God and pray for patience, understanding, and most of all-trust.

As always, thank you for your support. If you don’t already, give me a follow over on Instagram.

Lots of love and many blessings,

Chelsea

Hail to you, our King;
you alone are compassionate with our faults.